Managing Assignments
This article will walk you through all the ways in which you can manage uploaded assignments. If you have not yet read our article on how to enable assignments, we recommend reviewing that first.
Viewing Assignments
By default, admins with the Administrator role will be able to fully manage all uploaded assignments, and Group Leaders can manage assignments uploaded by users who are part of the group that they administer. However, there are user management plugins that allow you to expand these capabilities to other users & user roles.
Where to Find Them
- Navigate to Med LMS > ASSIGNMENTS
- You’ll immediately land on the All Assignments screen, where you can see all uploaded assignments
A few things to keep in mind when viewing assignments.
- By default, you’ll see a maximum of 20 assignments per page
- Assignments are sorted in reverse chronological order (most recently uploaded assignment appears first, at the top)
- Use the navigation arrows at the top & bottom of the table to locate the rest of your assignments (if you have more than 20)
Assignments Per Page
If you’d like to view more than 20 assignments at a time:
- Click the Screen Options tab at the top of the page
- In the “Number of items per page” box, enter your desired number of assignments
- Click the Apply button
NOTE
The higher the number you set, the longer it will take this admin page to load. In most cases, we don’t recommend you go much higher than 100 per page.
Filter Assignments
If you have hundreds or thousands of assignments, viewing all assignments on one page based on when they were uploaded might not be the most helpful. You can filter assignments based on the following criteria:
- Date uploaded
- Course uploaded to
- Lesson uploaded to
- Approval status
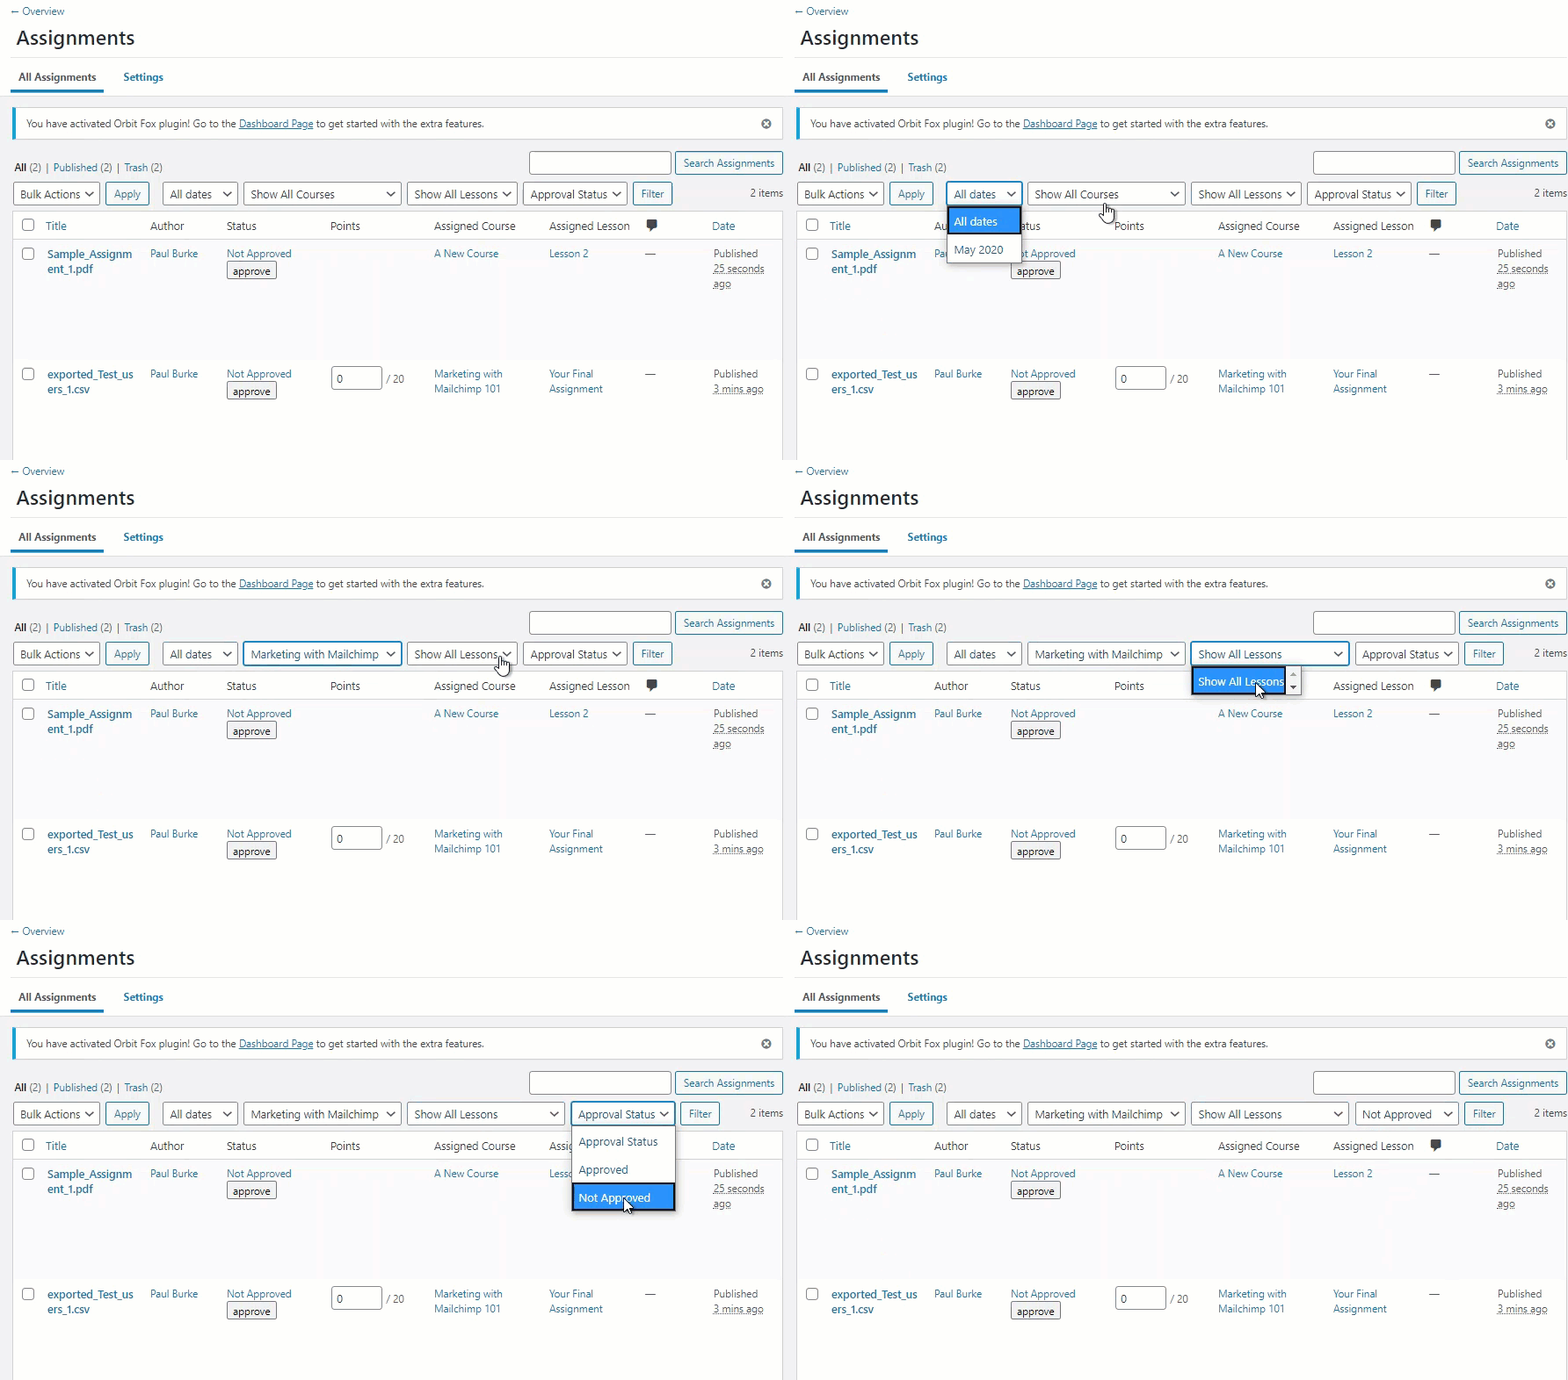
To filter assignments:
- Locate the filter bar near the top of the screen
- Click the dropdown menu for the criteria you want to filter by
- Choose a date, course, lesson or approval status
- Click the Filter button
You can use multiple filters at once. For example, you can filter by assignments uploaded in March 2020, to Course A, which are Not Approved.
Search Assignments
Another way to locate a specific assignment is to search for it.
- You can only search the Title column, which is equal to the file name. You cannot search by author or user’s name.
- If you plan to utilize the search feature while managing assignments, you might want to ask your users to name their file in a specific way so they are easier for you to find.
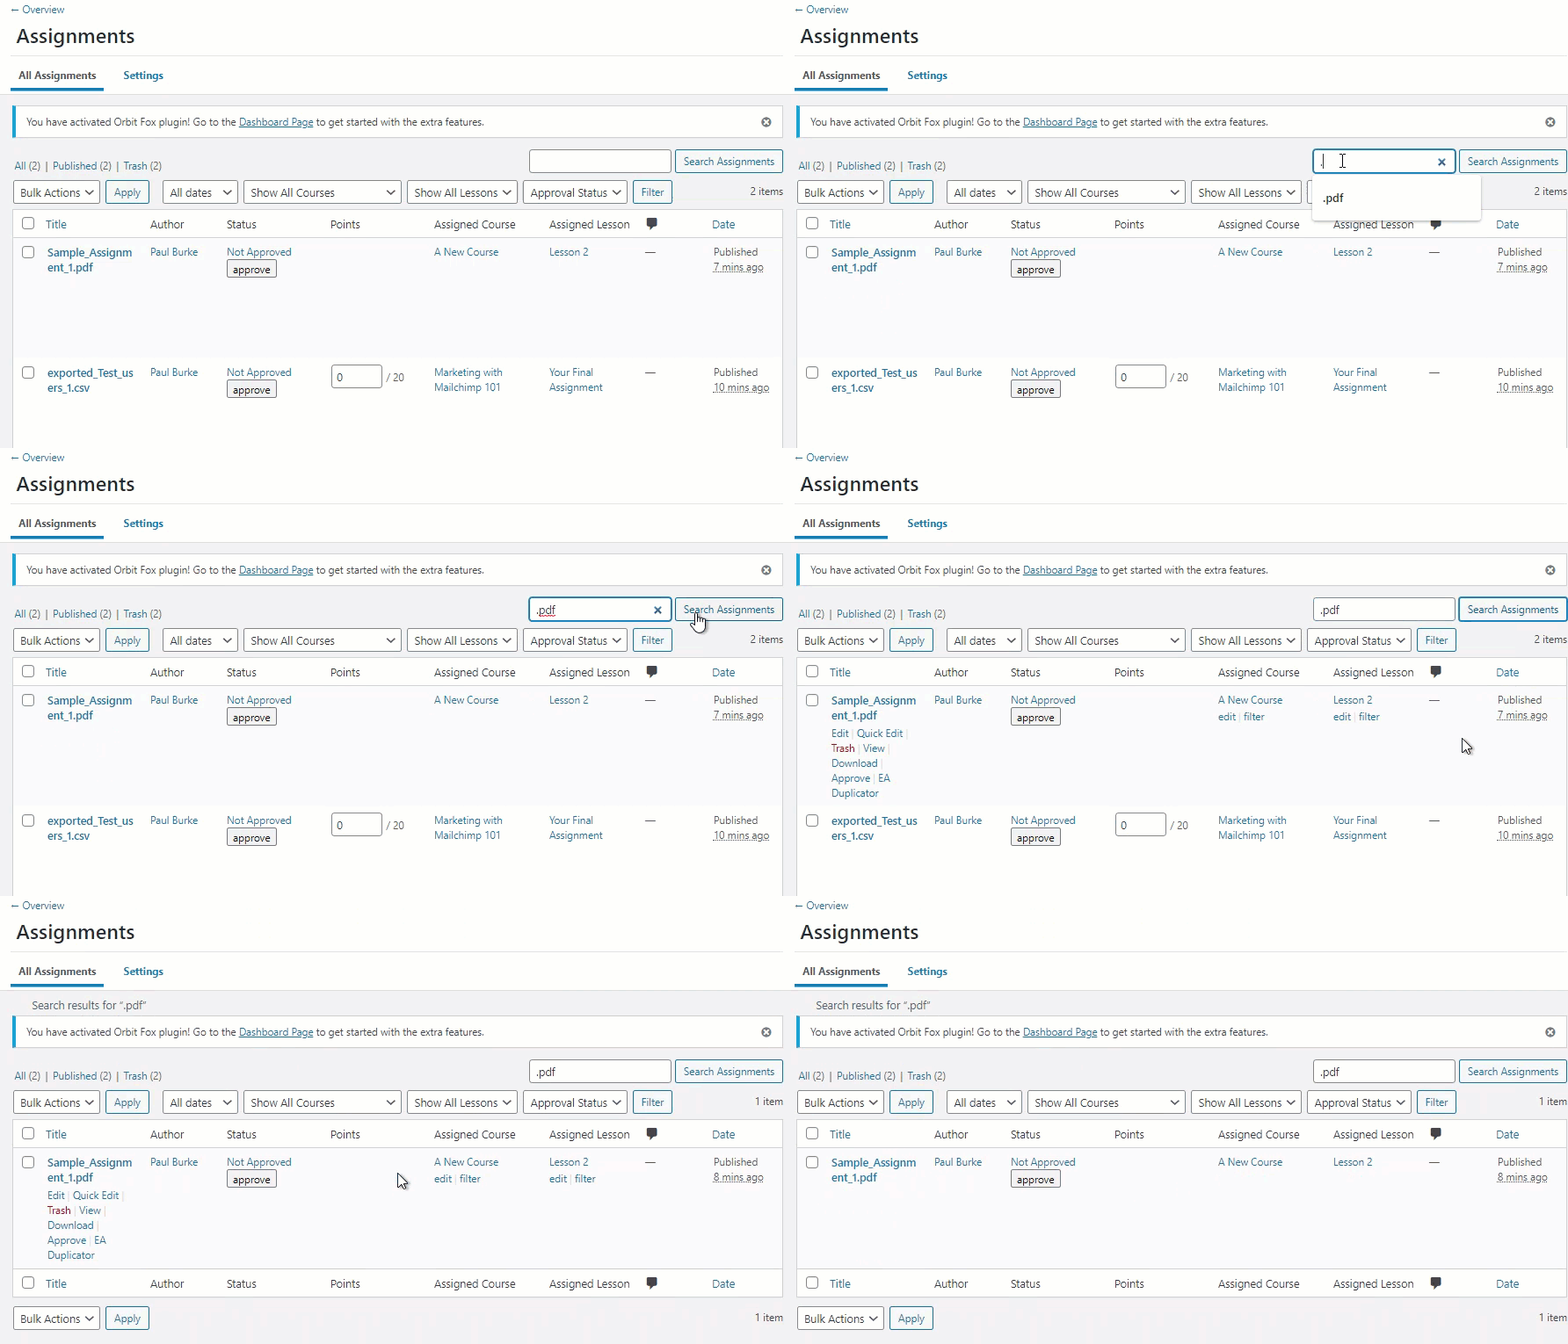
If you allow multiple file types to be uploaded, you can use the file extension to find all assignments of the same file type. For example:
- Search
pdfto find all PDF files - Search
mp3to find all mp3 audio files
Download Assignments
There are two ways to download a user’s assignment.
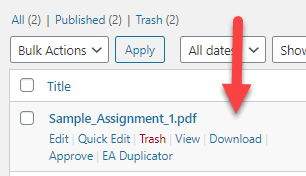
From the “All Assignments” screen (easiest):
- Hover over the row that contains the assignment you want to download
- Click the Download link
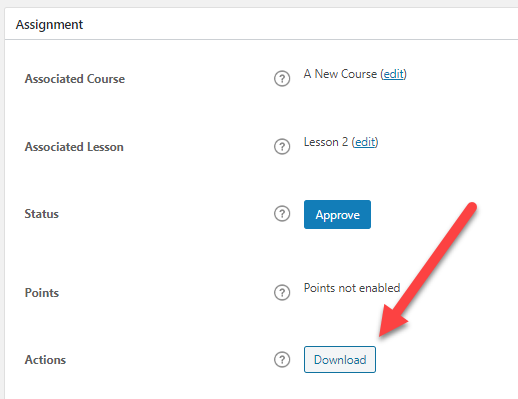
From the single assignment view:
- From the All Assignments screen, click on an assignment to edit it
- Locate the box titled Assignments
- At the bottom, next to Actions, click the Download button
Approve Assignments
WARNING
Once you’ve approved an assignment, you cannot unapprove it.
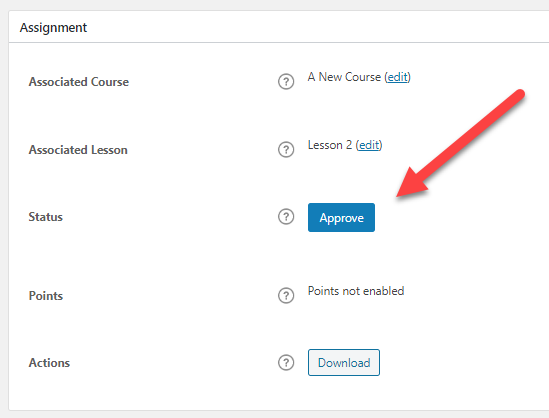
You can approve an assignment from the All Assignments screen, or on any individual assignment.
From the “All Assignments” screen:
- Under the Status column, simply click the Approve button

When viewing an individual assignment:
- Scroll down to the Assignments box
- Next to Points, click the Update & Approve button
(adjust the points first, if necessary)
What the User Sees
When assignments are pending approval, the user will see a note explaining that they have assignments awaiting approval.

Award/Adjust Points
If you’ve enabled points for an assignment upload, you can adjust them at any time.
From the “All Assignments” screen:
You can only adjust points on this screen if the assignment has not been approved yet.
- In the Points column, enter the number of points you’d like to award
- In the Status column, click the Approve button

If the assignment has already been approved, you can adjust points from the individual assignment page.
- Click on the assignment you’d like to adjust points for
- Scroll down to the Assignments box
- Next to Points, enter the points you’d like to award
- Click the Update & Approve button
NOTE
Adjusting points is always available, even after you’ve approved an assignment. There is no limit to the amount of times you can adjust the points.
What the User Sees
When viewing a lesson or topic to which they’ve uploaded an assignment, the user will see how many points were awarded for each assignment.

Provide Feedback/Comments
As a course administrator, you have the ability to provide feedback (or comments) on assignments.
NOTE
Make sure you’ve enabled comments in your global assignment settings.
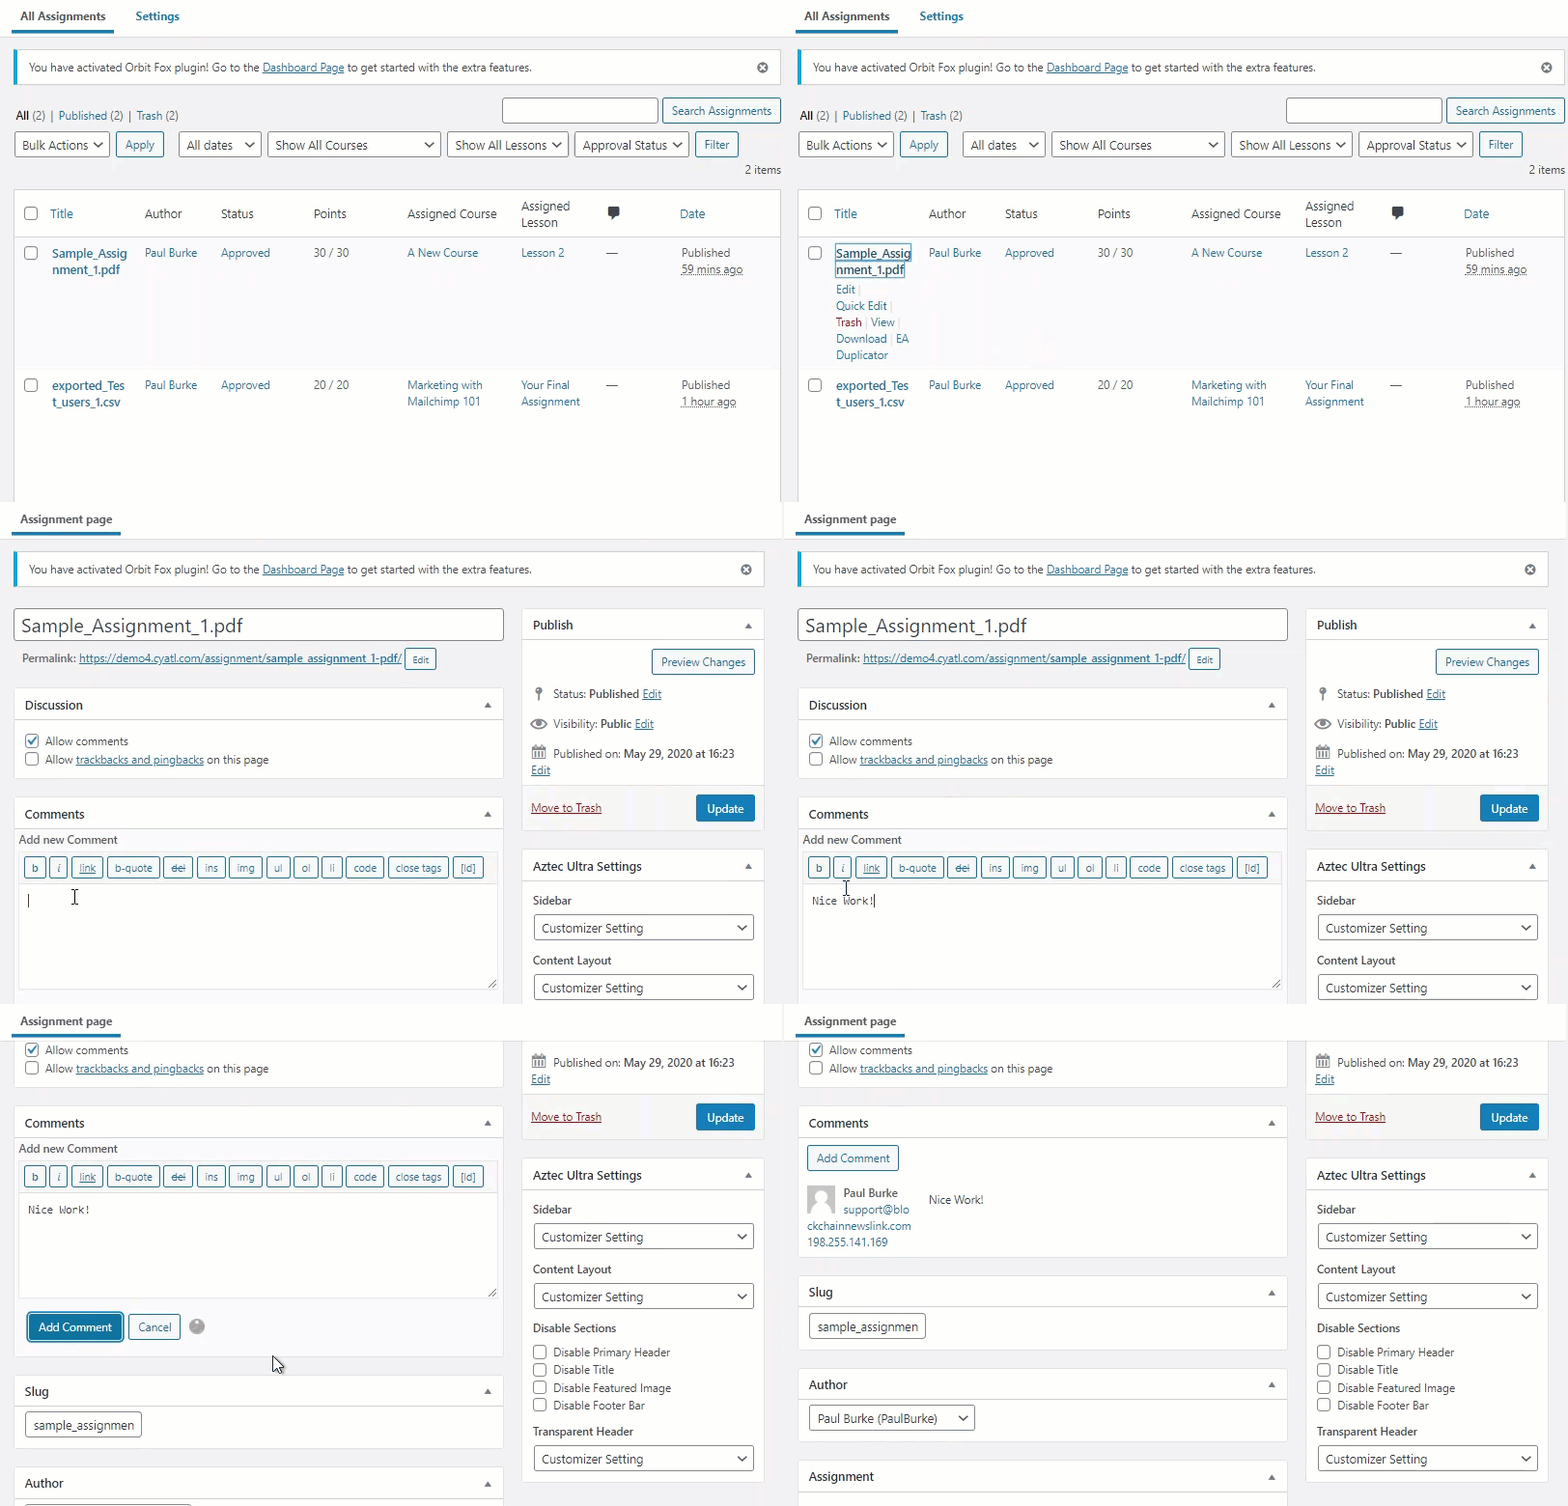
When your users view the lesson or topic that they uploaded assignments to, they’ll be able to see that you’ve posted a comment.
- They can click on the comment icon to be taken to the individual assignment page where all comments are listed.
- They’ll be able to respond with their own comments, as well.
Delete Assignments
- From the All Assignments screen, hover over the row for the assignment that you want to delete
- Click the red Trash link
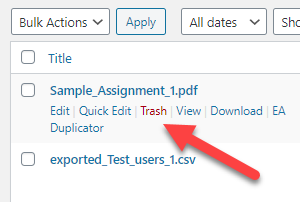
The assignment will immediately disappear from the lesson/topic page, and the user will no longer be able to see it.
However, as an admin, the assignment is placed in a trash bin. It can be recovered for up to 30 days, at which point it will then be permanently deleted.


