Table of Contents
Certificate Creation
Add a New Certificate

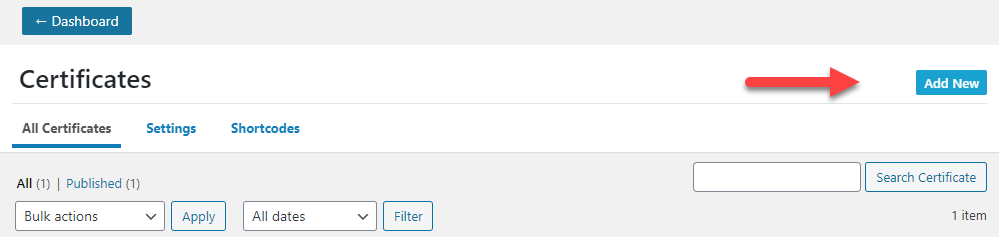
- In your Med LMS Courses Dashboard area click on CERTIFICATES.
- Click the Add New button
You’ll be directed to a new screen where you can start creating your certificate. Here’s an overview of each type of information that can be added to your certificate.
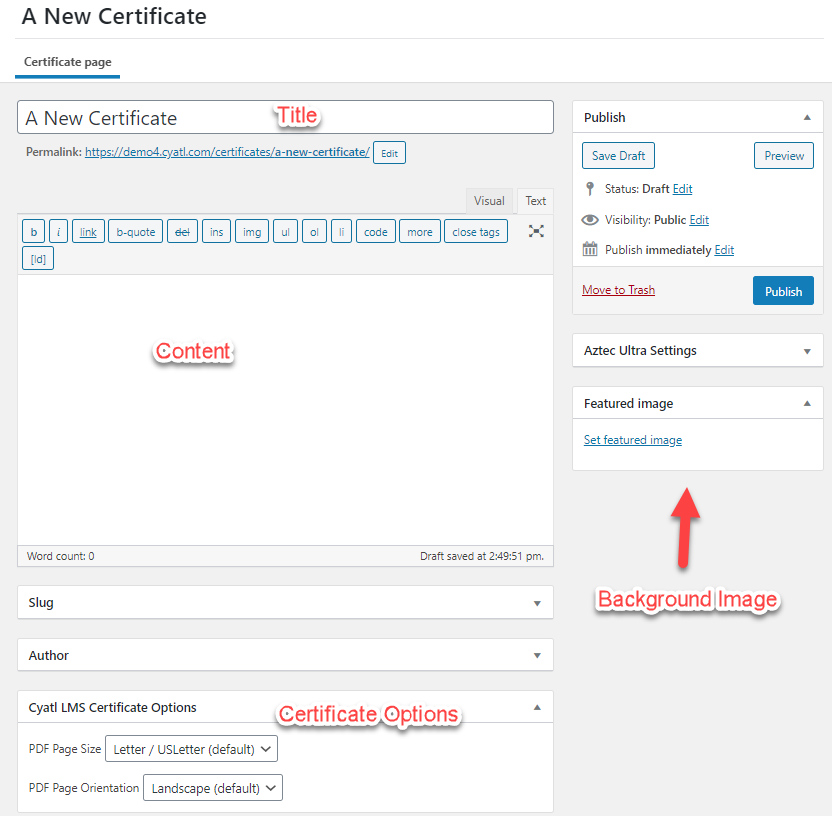
Title
The certificate title is only for internal use. Your users will not see this title, but it will be the name that appears in dropdown menus when you go to apply it to a course or quiz. Be sure to name it something you’ll recognize.
Featured Image
Adding a featured image is the way in which you apply a design, or style, to your certificate.
- IMPORTANT: You must use
.jpgimages, no more than 1MB in size. This also keeps your loading time to a minimum. - The size of your image should match your page size & orientation (see below). If you’re using an 11″ x 8.5″ US Letter size in landscape orientation, your image should match these dimensions. If you want your certificates to look great when printed, please also use 300 dpi.
- You may include text as part of your image. There are no restrictions to what you include in the image, but keep in mind, it will be shown on all certificates to all users. Text contained within an image is not dynamic and cannot be customized for each user.
To add a featured image:
- Click the “Set featured image” link
- Choose an image from your Media Library, or upload a new one
- Click the Set featured image button
How to Create an Image
You can use any image creation or editing program you’d like, hire a designer or use images from a graphics library (as always, please check the license to make sure you have permission to use the image). Here are a few suggestions:
- Canva allows you to use pre-made templates for free, and add some customization of your own. Small upgrades are available, and very affordable.
- Envato Elements is a premium graphics library with tons of pre-made certificate templates.
- Creative Market is another premium marketplace where you can find certificate templates, as well as graphics to make your own.
- Adobe’s Creative Cloud is also an option for more design-oriented users, or anyone already familiar with their design software (Photoshop, Illustrator, InDesign, etc.). A premium subscription is required.
Content
Your certificate content will mostly consist of dynamic fields that are generated for each individual user who is awarded a certificate. For example:
- User’s Name
- Course Title
- Date of Completion
- …etc.
These types of dynamic fields are inserted via shortcodes. We have an entire article dedicated to certificate shortcodes here →
When adding your certificate content, you’ll need to use some HTML & CSS to set up the overall layout, spacing, sizing, etc. We’ll walk you through some common layouts below, and how to achieve various designs.
Vertical Spacing
You might want to insert the course title at the top of a certificate, the user’s name in the middle, maybe at a completion date at the bottom, etc. One of the best ways to control vertical spacing, and move content up or down on your certificate, is to use the line-height property.
Wherever you need to insert some blank vertical space, you can use the following code:
<p style="line-height:20px;"></p>This would add 20 pixels of vertical space. You can adjust the 20px to another value. Since our final certificate uses inches, not pixels, you’ll need to play around with this value to achieve your desired result. (see below for previewing certificates)
You can insert as many of these spacers as you need throughout the certificate.
Horizontal Spacing (Indentation)
There are a few ways to go about horizontal spacing.
If you need to center your text in the middle of the certificate, you can use text-align:center;. Here’s an example of the user’s first name, centered horizontally:
<p style="text-align:center;"></p>By default, all text will be aligned to the left edge of the certificate (right edge for RTL languages). If you need to indent something, you can use the text-indent property. Here’s an example of the course completion date being pushed vertically towards the bottom of the page, then indented to move it to the far-right corner.
<p style="line-height:150px;"></p>
<p style="text-indent:200px;"></p>
You’ll need to adjust the 150px and 200px values to match up with your certificate image.
Font Size
You can also adjust the font size of any text. Let’s say you wanted your user’s first & last name to be quite large (30px), then a small vertical space (10px), and then the course title not quite as large as the name (20px), you could do this:
<p style="font-size:30px;"> </p>
<p style="line-height:10px;"></p>
<p style="font-size:20px;"></p>
Font Family
Different computers come pre-installed with different fonts. Some users will have a font installed, and others might not. So there isn’t a ton of flexibility with using custom fonts in certificate creation. However, you can switch between serif and sans-serif fonts, as both should work for most of your users. Here’s an example using a generic serif font:
<p style="font-family:serif;"></p>Color
You can adjust the color of any text on your certificate. If your image has a dark background, you can use the color property to make your text white.
<p style="color:#ffffff;"></p><p style="text-indent:20px;font-size:30px;color:red;"> Certificate Options
There are a few additional options you can set for your certificate.
PDF Page Size
Choose between the following options:
- US Letter (default): 8.5″ x 11″
- A4: 8.3″ x 11.7″
PDF Page Orientation
Choose between the following options:
- Landscape (default): width is longer than height
- Portrait: height is longer than width
Certificate File Format
When a user earns a certificate, either by completing a course or passing the certificate threshold for a quiz, they’ll be able to download it in PDF format. All LearnDash certificates are provided as a .pdf file.
When a user clicks a button to get their certificate, some web browsers will open the PDF file in the browser, and others might download the file to the user’s computer. Whatever the default behavior for that user’s browser is, that’s how LearnDash certificates will behave as well.
Previewing Certificates
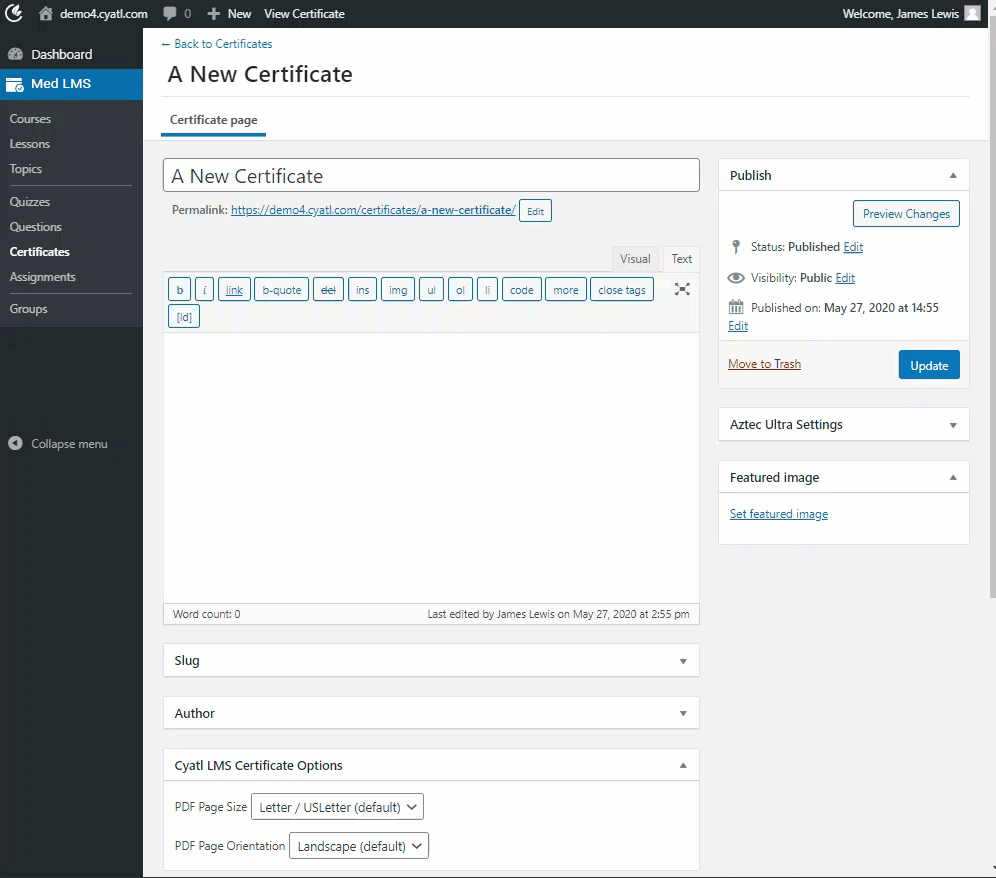
- Create your certificate, and make sure you Publish it
- Then, navigate to Med LMS > QUIZZES
- Click Add New to create a new quiz
- Give the quiz a title
- On the Settings tab, next to Quiz Certificate, choose the certificate that you want to preview
- Add a single choice question to the quiz, with an obvious correct answer
- Publish the quiz
- Open the quiz in a new tab
- Choose the correct answer, and click Finish Quiz
- Click the Print Your Certificate button
NOTE
If you decide to create a test course, don’t forget to delete this quiz (or course) when you’re finished testing your certificate.